

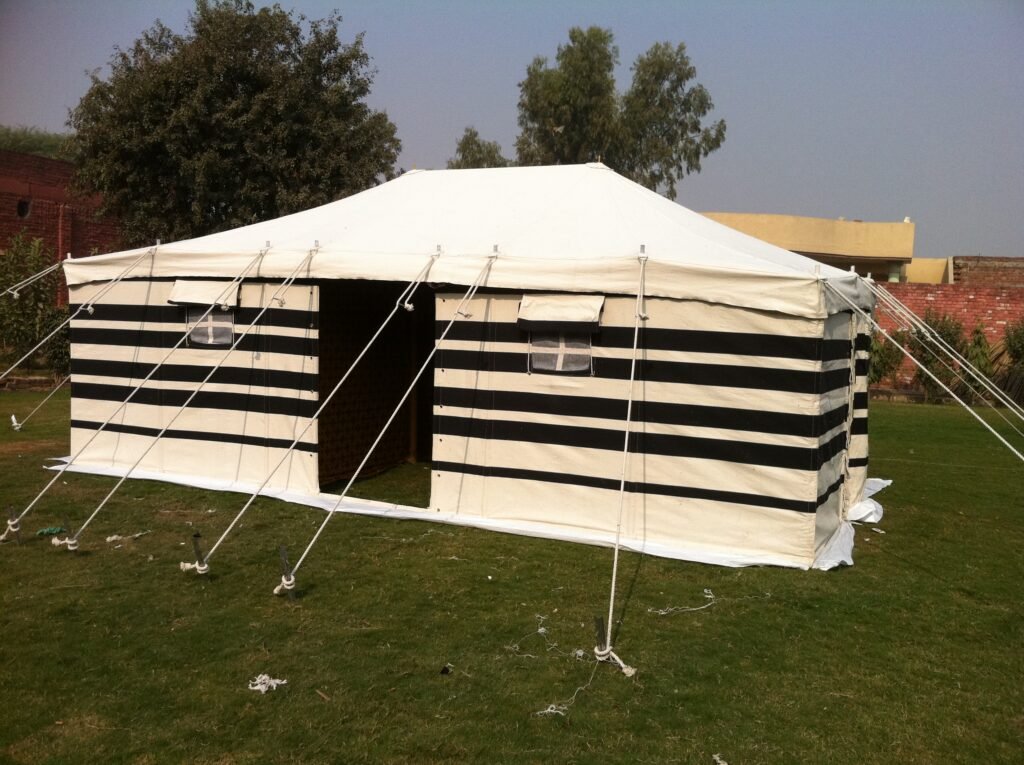
Pakistani readymade tent are the best choice due to their durability, ease of setup and affordability. Because Tents are an integral part of outdoor activities, offering shelter and comfort in a variety of environments. Whether you are planning a family camping trip, a large gathering or a special event,
Why Choose a Pakistani readymade tent?
It’s important to comprehend the following before beginning the installation method to ensure that Pakistani ready-made tent are highly regarded:
- High-Quality Materials: These tents are frequently constructed to endure inclement weather since they are composed of sturdy materials like canvas, polyester, or PVC.
- Versatile Designs: Pakistani readymade tent are ideal for outdoor occasions like weddings and camping. They range in size and style from modest dome tents to larger marquee tents.
- Affordability: Pakistani readymade tent are generally more reasonably priced than their counterparts from other locations, providing exceptional value for the money, despite their superior quality.
- Easy Setup: Both novice and seasoned campers will find these tents to be well suited for their simple and rapid setup.
Tools and Equipment You’ll Need
Gather the necessary supplies and tools before beginning the installation of Pakistani readymade tent:
• Tent bundle
(ropes, pegs, and poles included)
• Tarp or groundsheet
(optional for extra protection)
• Hammer or mallet
(for pounding pegs into the earth)
• Tent stakes
if not part of the bundle
• Guy lines or rope
• A helper or buddy
(best suited for larger tents)
Step 1: Select the Right Location
Choosing the right location is crucial for a successful installation of Pakistani readymade tent. Here’s what to consider:
- Flat Ground: To reduce discomfort and to prevent water from collecting under the tent in the event of rain, make sure the space is level.
- Clear out Debris: Get rid of any sharp objects, rocks, or sticks that can scratch the tent’s floor or cause discomfort in the sleeping space.
- Wind Shelter: To shield the tent from severe winds, position it as close to hills or trees as feasible.
- Take Drainage Into Account: Steer clear of low-lying locations where rain may collect. Go for a position that is a little higher.
Step 2: Unpack and Lay Out the Tent
After choosing the right spot, unpack the tent and lay out all the components:
- Tent Body: Lay out the tent body in the desired configuration, spreading it flat on the ground. Make sure the entrance is facing the proper direction and that it is correctly positioned.
- Poles: Sort and arrange the tent poles separately. Color-coded poles are a common feature of pre-made tents from Pakistan that make identification simple.
- Tarp or Groundsheet (Optional): Place a tarp or groundsheet underneath the tent to provide more protection from the elements and wetness. Make sure it fits the tent just a little bit snugly to avoid water pooling between the groundsheet and tent floor.
Step 3: Assemble the Tent Poles
Next, you’ll need to assemble the tent poles. Depending on the type of Pakistani readymade tent this process may vary slightly:
- Connect the Poles: Connect the parts of the poles together. It’s common for dome tents to feature two or more long poles that cross in the center. There can be extra support posts for larger tents.
- Fit Sleeves with Poles: After the poles are constructed, slide them into the appropriate sleeves or clips on the tent body. The structure that will hold up the tent is made in this step.
- Set Up the Tent: After the poles are in position, raise the poles to gently raise the tent. Two people could be needed for this, particularly for larger tents. Verify that the tent stands firmly and that the poles are in the right places.
Step 4: Secure the Tent to the Ground
With the tent now standing, it’s time to secure it to the ground to ensure stability:
- Stake Down the Corners: To begin, insert pegs through the grommets or loops located at the corners of the tent.
- Tighten Guy Lines: Extra guy lines that aid in stabilizing the structure. Stake these lines at an angle into the ground and secure them to the tent’s loops. To make sure the tent is solid and taut, tighten the lines.
- Check the tension: To make sure the tent security is fast and equally tension go around it. And Also make any necessary adjustments to the guy lines and stakes.
Step 5: Set Up the Interior
Now that the tent is securely in place, you can focus on setting up the interior:
- Install the Inner Tent (if applicable): An inner tent that serves as a sleeping compartment. It included with some ready-made tents from Pakistan. Use the clips or toggles which is include for main tent.
- Lay Down Sleeping Mats: Inside the tent, arrange your cots, air mattresses, or sleeping mats. To prevent condensation, place them away from the tent walls.
- Organize Your Gear: Place bulky objects close to the tent’s sides to avoid causing damage to the floor, and store your goods in specific sections. For smaller items, use hang loops or inner pockets.
Step 6: Weatherproofing and Final Checks
Before settling in, it’s important to weatherproof the tent and perform some final checks:
- Rainfly Installation: Install the rain fly over the tent if included with your tent. The rainfly adds another degree of defense against wind and rain. Make sure security is fast. And stays away from the tent’s body to prevent leaks.
- Ventilation: To promote airflow and lessen moisture within the tent, open any windows or vents. A comfortable camping experience requires enough ventilation particularly in humid weather.
- Inspect for Gaps: Examine the tent from top to bottom for any openings or loose spots that could allow water or wind to enter. To seal any gaps, move the guy lines and stakes as needed.
Step 7: Dismantling the Pakistani readymade tent
- Remove Stakes and Guy Lines: First, pull out all of the guy lines and stakes. Then, fold up the lines neatly for storage.
- Disassemble the Poles: Remove the poles gingerly, being careful not to let them tangle or snap back. Divide them into their component parts and place each one in its own bag.
- Pack the Tent: Wipe off any dirt from the tents before folding. If at all possible, fold in accordance with the original design to facilitate packing. For the rainfly, poles, and tent body, use a tent bag.
- Tent Drying: To avoid fungus let the tent hang out to dry fully before packing.
Conclusion
Anyone may learn how to install a Pakistani readymade tent with a little experience; it’s an easy operation. You can make sure that your tent’s set up effective and secure. And offering a cozy and secure shelter for your outdoor trip. An affordable, well-made Pakistani readymade tent is an ideal choice for any outdoor event or camping trip. It is easy to use also very durable and affordable. You’ll be well on your way to taking pleasure in the great outdoors in comfort and style with the correct planning and attention to detail.